How to Build a Custom Shopify Section with Liquid (Step by Step)

Most Shopify themes come with good sections, but sooner or later a store needs something the theme does not have. Many store owners install another app for every small layout. A better option is a custom section written in Liquid. It loads faster, has no monthly fee, and the store owner can still edit everything from the theme editor.
In this guide I'll build a simple testimonial strip section from scratch. The same pattern works for almost any section you need: feature lists, logo walls, FAQs or booking blocks.
What a Shopify section is made of
A section is one .liquid file inside the sections folder of your theme. It has three parts:
- HTML and Liquid that output the content
- CSS that styles it
- A schema in JSON that tells the theme editor which settings and blocks to show
Settings are for things that appear once (like a heading). Blocks are for things the merchant can add, remove and reorder (like each testimonial).
Step 1: Create the file
In your Shopify admin go to Online Store → Themes → … → Edit code. Under sections, click Add a new section and name it testimonial-strip. Always work on a duplicate of your live theme so you never break the real store.
Step 2: Write the markup
This loops through every block the merchant adds and prints the quote and the customer name:
<section class="ts-{{ section.id }}">
  <div class="ts-wrap">
    {%- if section.settings.heading != blank -%}
      <h2>{{ section.settings.heading | escape }}</h2>
    {%- endif -%}
    <div class="ts-grid">
      {%- for block in section.blocks -%}
        <figure class="ts-card" {{ block.shopify_attributes }}>
          <blockquote>{{ block.settings.quote }}</blockquote>
          <figcaption>{{ block.settings.author | escape }}</figcaption>
        </figure>
      {%- endfor -%}
    </div>
  </div>
</section>
Two details matter here. section.id gives each copy of the section a unique class, so two strips on the same page never fight over styles. And block.shopify_attributes lets the theme editor highlight the right block when the merchant clicks on it.
Step 3: Add the schema
The schema goes at the bottom of the same file. This is what makes the section editable without code:
{% schema %}
{
  "name": "Testimonial strip",
  "settings": [
    { "type": "text", "id": "heading", "label": "Heading", "default": "What customers say" },
    { "type": "range", "id": "columns", "label": "Cards per row", "min": 1, "max": 4, "step": 1, "default": 3 }
  ],
  "blocks": [
    {
      "type": "testimonial",
      "name": "Testimonial",
      "settings": [
        { "type": "richtext", "id": "quote", "label": "Quote", "default": "<p>Great product, fast shipping!</p>" },
        { "type": "text", "id": "author", "label": "Customer name", "default": "Happy customer" }
      ]
    }
  ],
  "presets": [
    { "name": "Testimonial strip", "blocks": [{ "type": "testimonial" }, { "type": "testimonial" }] }
  ]
}
{% endschema %}
The presets part is important. Without it, the section will not appear in the Add section list of the theme editor.
Step 4: Style it
Put the CSS inside a {%- style -%} tag so you can use Liquid values like the number of columns:
{%- style -%}
  .ts-{{ section.id }} .ts-wrap { max-width: 1200px; margin: 0 auto; padding: 60px 20px; }
  .ts-{{ section.id }} h2 { text-align: center; margin-bottom: 32px; }
  .ts-{{ section.id }} .ts-grid {
    display: grid;
    grid-template-columns: repeat({{ section.settings.columns }}, minmax(0, 1fr));
    gap: 20px;
  }
  .ts-{{ section.id }} .ts-card { border: 1px solid rgba(0,0,0,.1); border-radius: 12px; padding: 24px; margin: 0; }
  @media (max-width: 749px) {
    .ts-{{ section.id }} .ts-grid { grid-template-columns: 1fr; }
  }
{%- endstyle -%}
Step 5: Add it from the theme editor
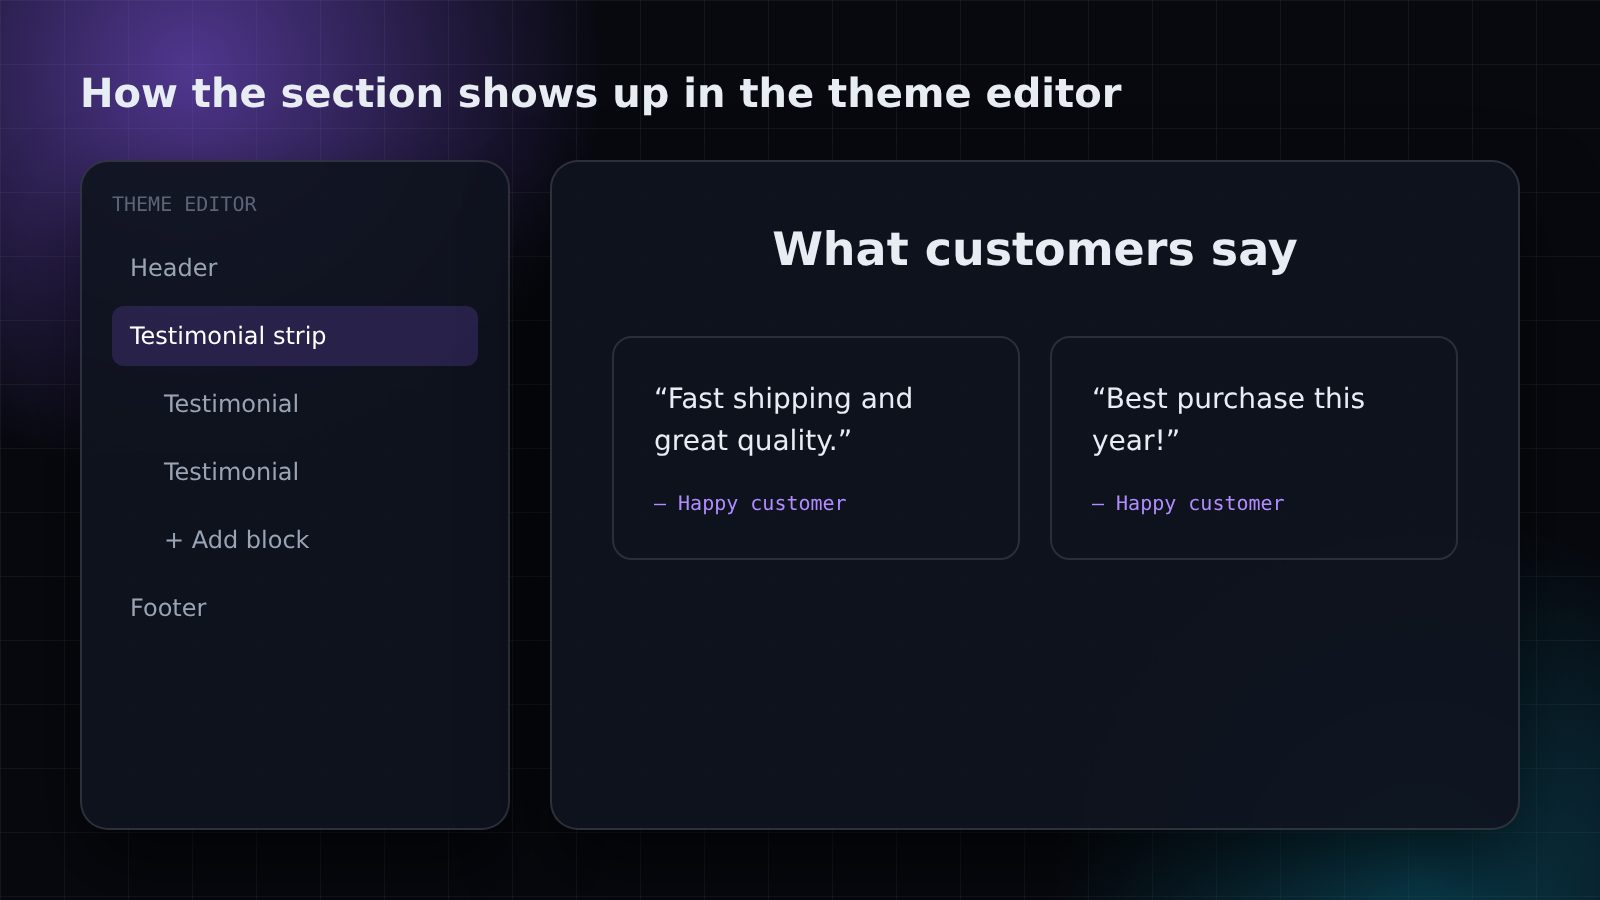
Save the file, open Customize, click Add section and choose Testimonial strip. You can now change the heading, add more testimonials and drag them into any order.
Tips that save time later
- Use
| escapeon plain text settings so special characters never break your HTML. - Give every setting a sensible
default, so the section looks good the moment it is added. - Keep class names prefixed with the section id to avoid clashes with the theme.
- Test on mobile in the theme editor before you publish.
A good custom section feels like it was always part of the theme. The merchant should never need to call a developer to change a word.
If you need a custom section built for your store, from a simple content block to a full booking system, send me a message and I'll take a look.
Need help with your project?
Shopify development, AI automation and custom bots. Tell me what you need and I'll reply with a plan.
Get in touch